How to connect Shopify to Kosmos eSync
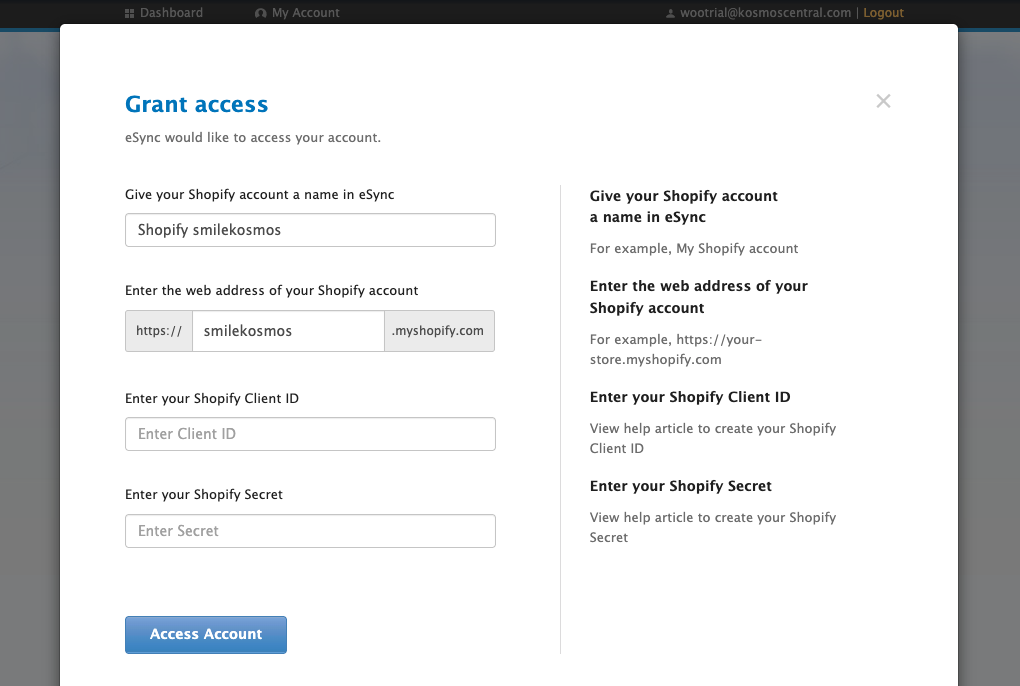
Click on Create Action and choose the Shopify Logo to Grant Access to your Shopify store. View the instructions to your right, with link examples.

Below you’ll find instructions on connecting your Shopify store with eSync from our eSync dashboard.
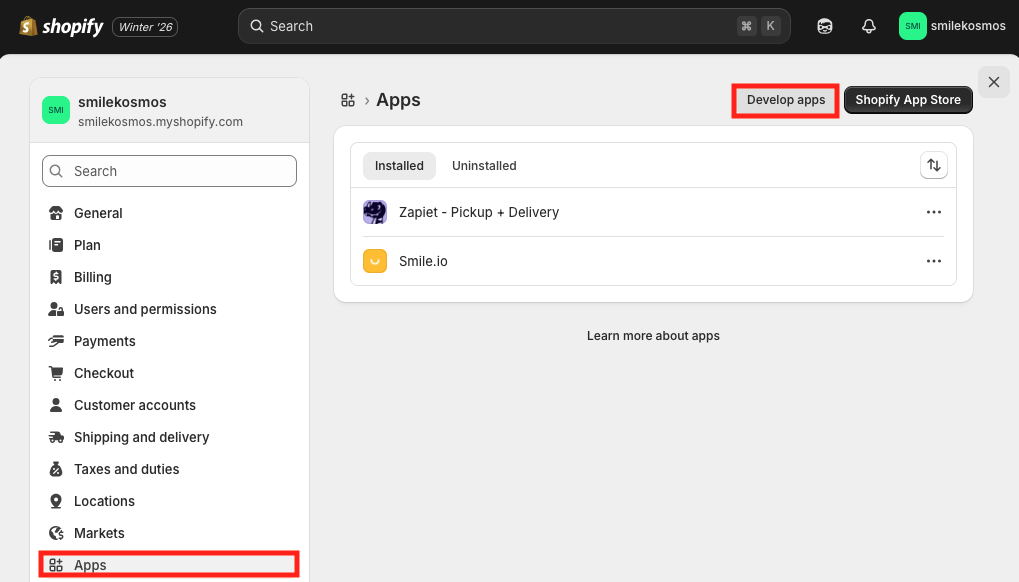
To create a Shopify Client ID and Secret, login to the Shopify admin area and select Settings in the left sidebar.

Select Apps from the left menu, then click the Develop apps button in the top right corner.
Next: click Build apps in Dev Dashboard.
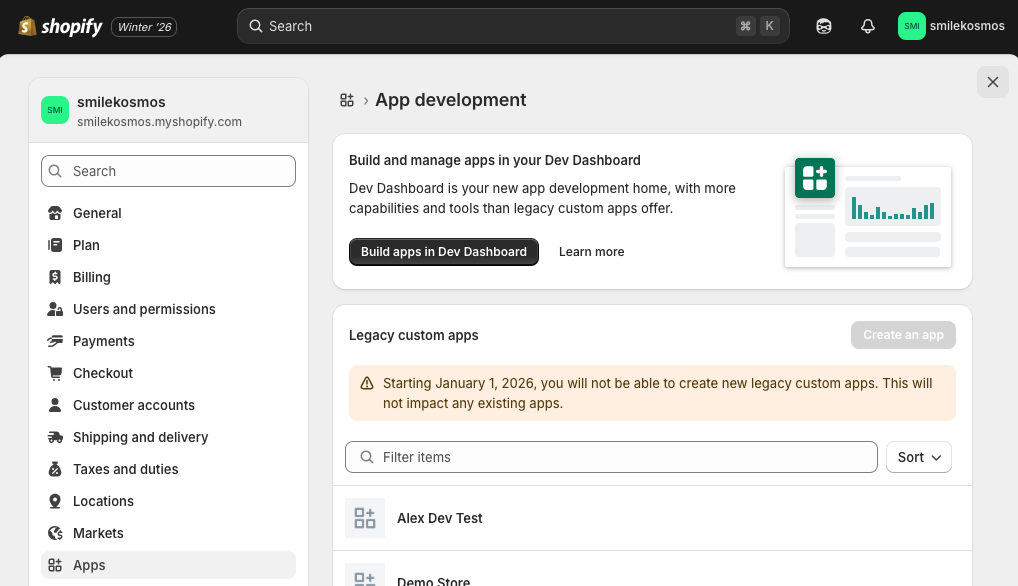
In the top right corner select Create app.

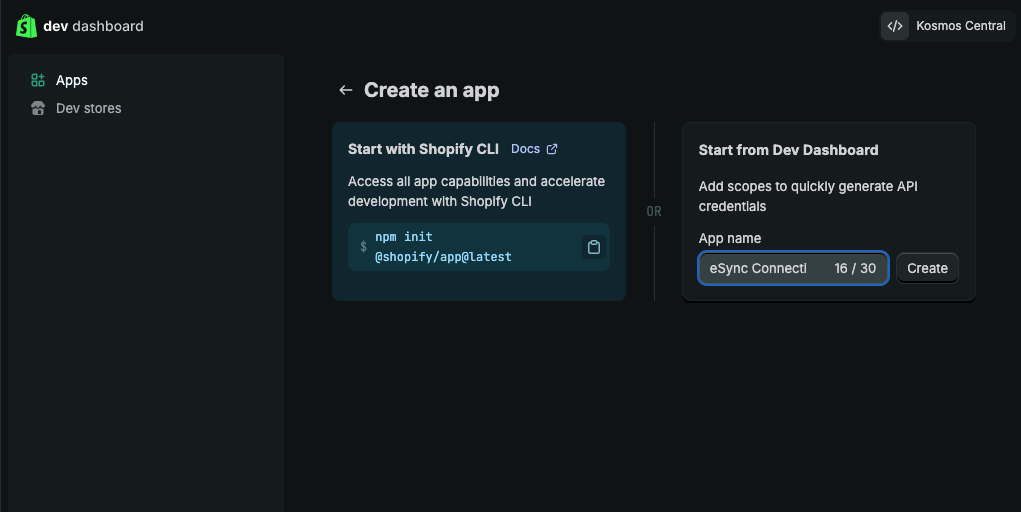
Under Start from Dev Dashboard give your app a name (such as, eSync Connection) and click the create button.
Make sure Versions is highlighted in the left menu, scroll down to the Access section, and next to scopes click Select scopes.

Next: scroll down and select the checkboxes next to the following scopes:
Admin API – Customer: read_customers and write_customers

Note: For API access to personally identifiable information (PII), including customer names, addresses, phone numbers, and email Shopify requires that you subscribe to the Grow Plan or higher.
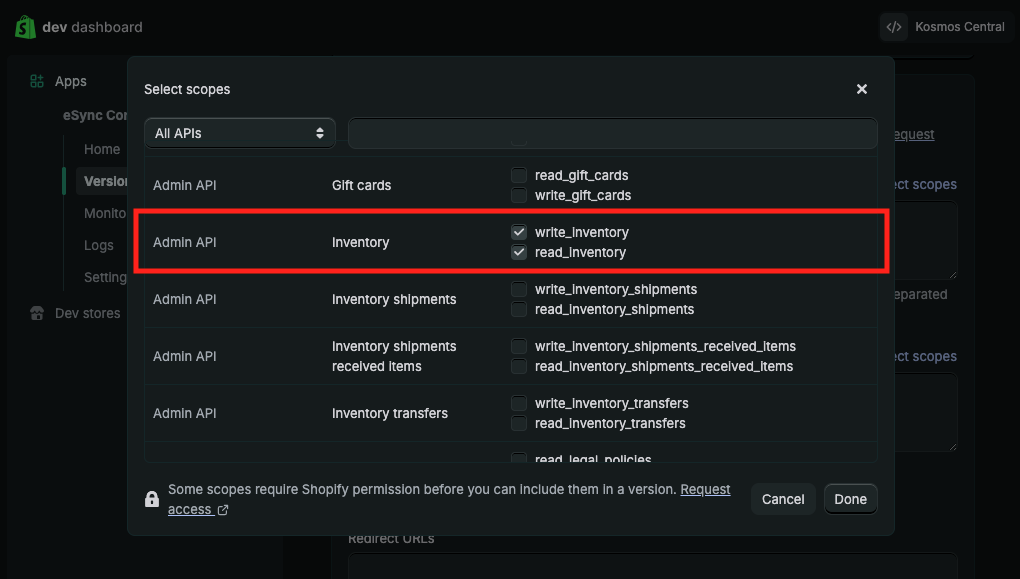
Admin API – Inventory: write_inventory and read_inventory
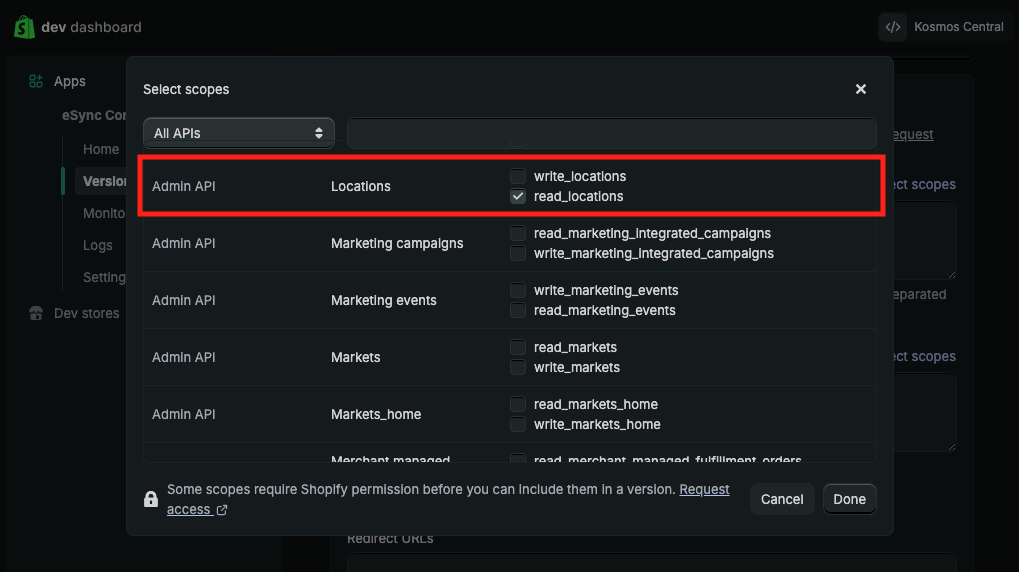
Admin API – Locations: read_locations
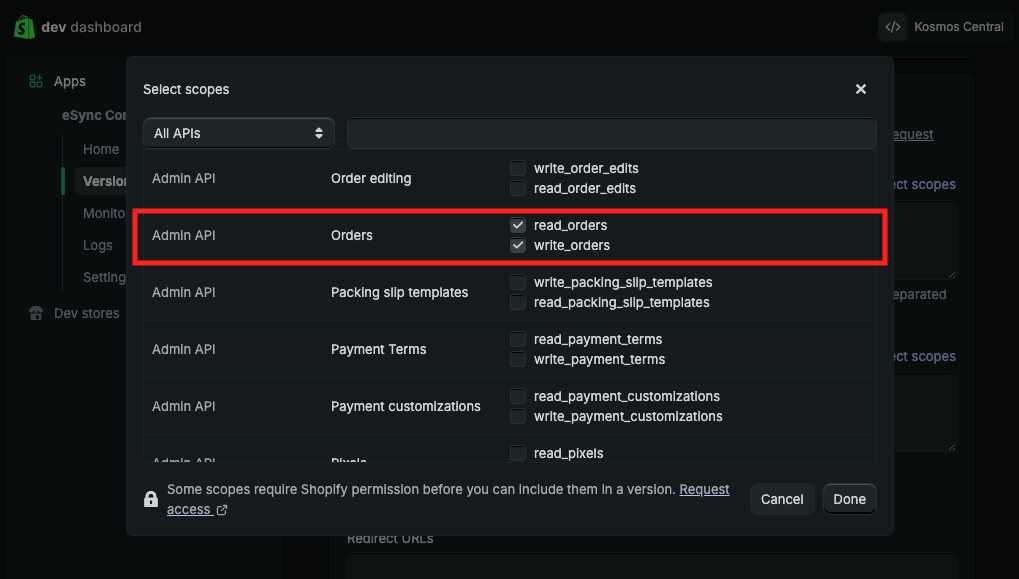
Admin API – Orders: read_orders and write_orders
Note: For API access to personally identifiable information (PII), including customer names, addresses, phone numbers, and email Shopify requires that you subscribe to the Grow Plan or higher.
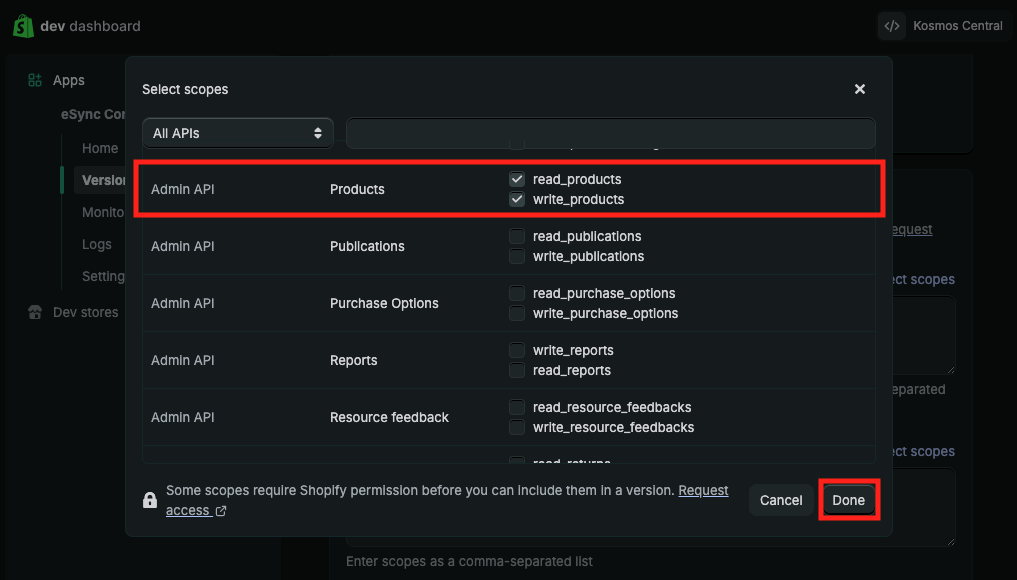
Admin API – Products: read_products and write_products
After selecting the product scopes, click the Done button in the bottom right corner.
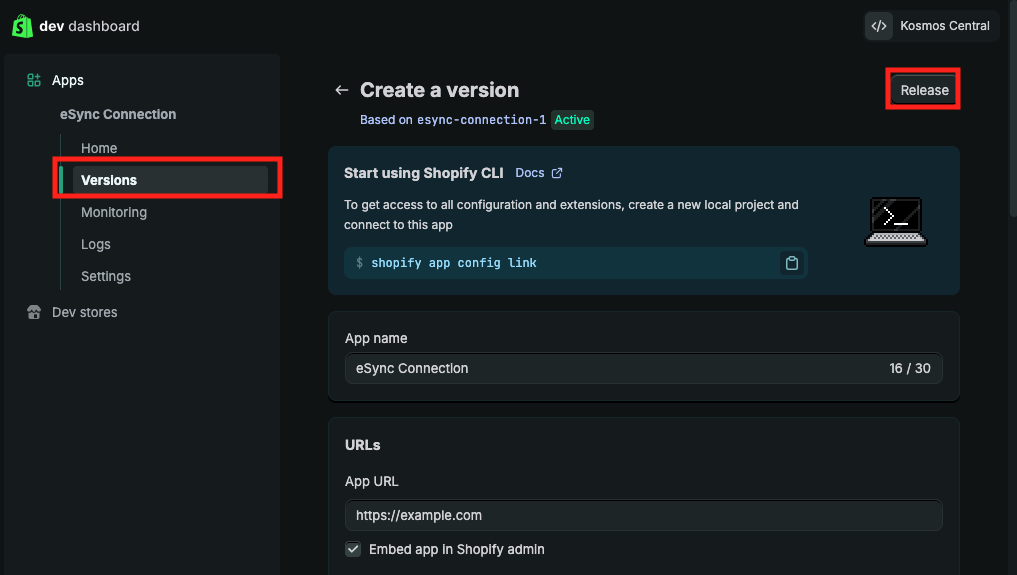
Next: scroll back to the top of the Versions area, and click the Release button in the top right corner.
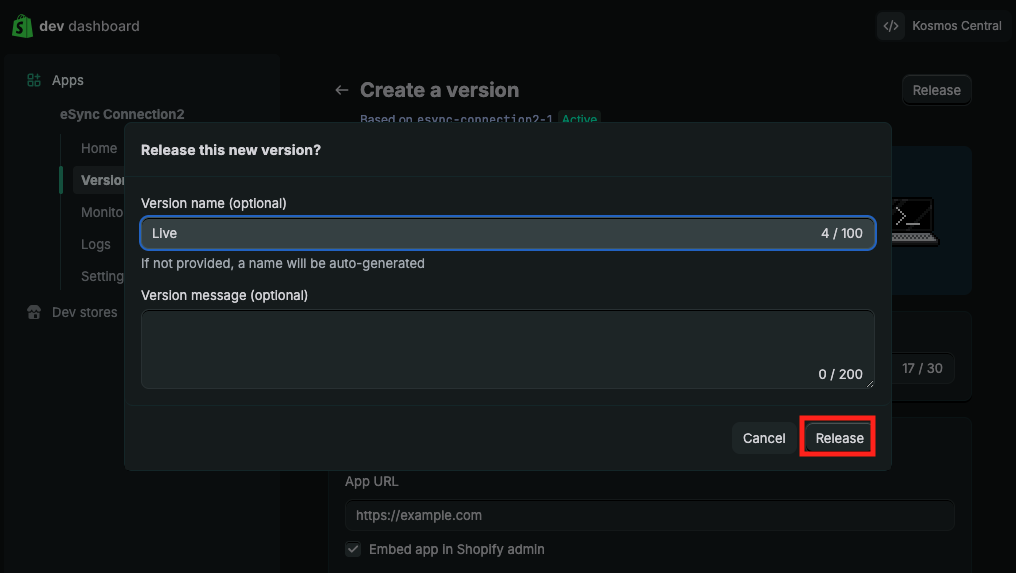
Give your version a name (such as, Live) and click the Release button in the bottom right corner.
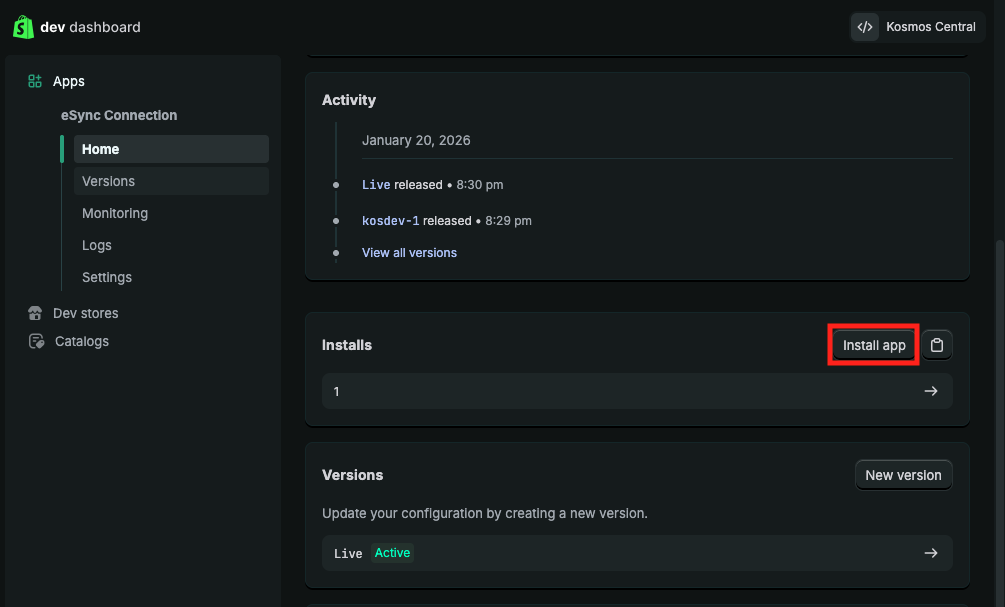
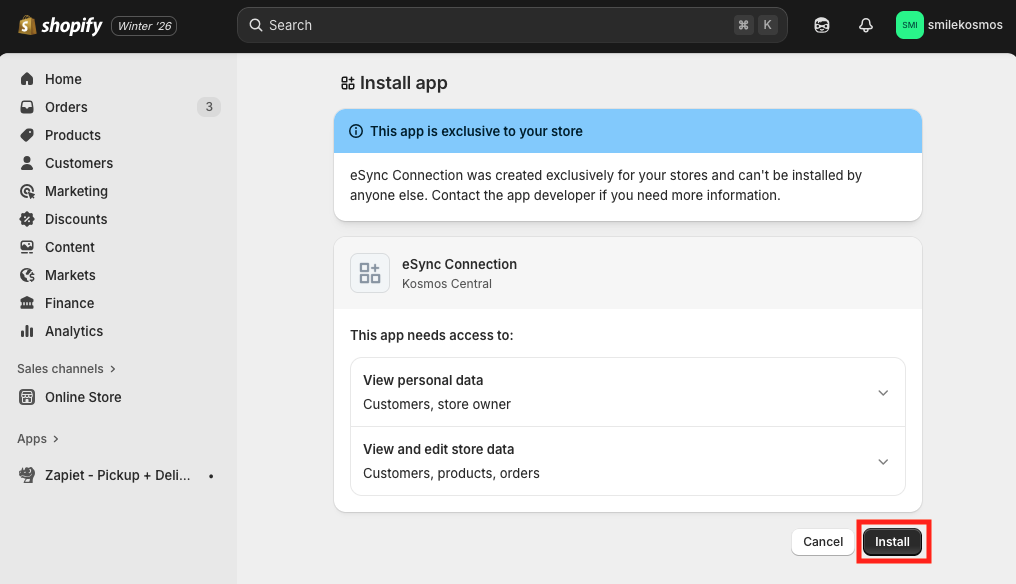
Next: in the left sidebar, choose Home, scroll down to the Installs section, and click Install app.
If you are NOT a Shopify merchant,click hereto view instructions on how to install the app for a Shopify partner account.
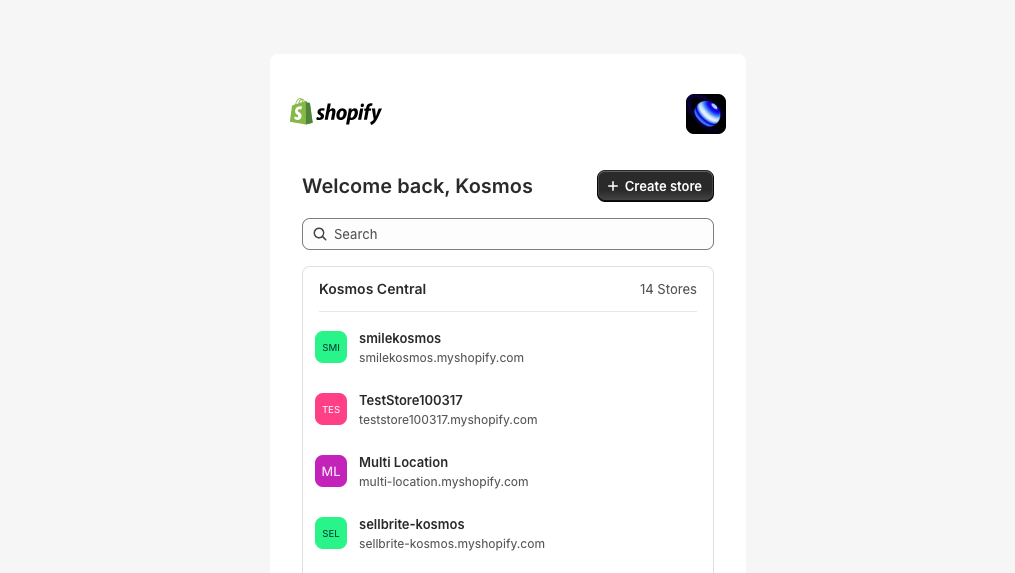
After you click Install app this will open a new window with a list of Shopify accounts. Select the Shopify account where you wish to install and activate the eSync Connection.
Next: click the Install button in the bottom right corner.
Now that the app is activated and installed in your Shopify account go back to your browser window with the Dev Dashboard.
In the left sidebar, choose Settings, and under Credentials copy your Client ID and Secret into a text file for later reference.
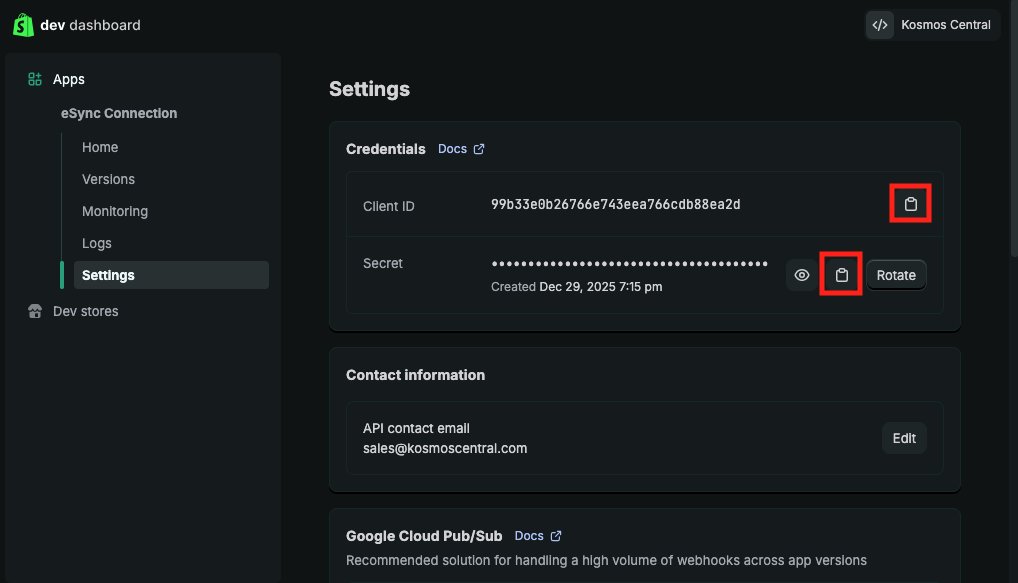
The Shopify Client ID and Secret you saved to the text file can be used to setup the Shopify connection in your eSync Dashboard.
Next: Login to your eSync Dashboard, click the Create Action button and choose the Shopify Logo to Grant Access to connect your Shopify store.
Complete the Grant access form, and click the Access Account button to connect your Shopify account.